Wednesday, 31 October 2012

Internal Colour and Electrical Appointment-3

Update on Electrical Plans and Variations

After exchanging numerous emails amending, clarifying and fixing errors, we finally signed off on our electrical plans and variations. Our electrical variations totalled just below 11 K. When considering that our house would be 44 Squares, we think we did spend OK (some Metricon customers have spent about 16 to 20 K for a similar sized house).

Following are the prices of some of the items we selected:
  • Batten holder: $40
  • 2, 3 or 4 way switches: $50, $80 or $240 respectively
  • Double Power Point: $45
  • Few different types of outdoor sockets: $80 approximately
  • Power supply to Island bench (for easy access to toaster): $110
  • Free-to-Air TV point: $75
  • Pay TV point: $80
  • Phone socket: $90
  • Data/Phone (Cat 6): $115
  • Speaker cable provision / Blank plate: $110
  • TV conduit provision (for wall mounting TV): $115
  • Ducted exhaust fan (provision, unit and installation): $300
  • Sunshine 6600A Heat-Fan-Lamp (2 heat lamps): $450
  • Wiring only for ceiling fans: $40
  • Timber noggin (for mounting moderately heavy pendant lamps): $10
  • Junction box provision: $75
  • Pre-wire for future doorbell: $150
  • NBN (National Broadband Network) conduit provision: $380

See pictures below on how the conduit and NBN equipment respectively would look like.


Sunday, 14 October 2012

Internal Colour and Electrical Appointment-2


I was hoping to receive the costing on our internal selections, so that I could post the details on the blog; however, the Studio M manager sent her apologies a few times in the past week for not providing the costing. Apparently, there are a few items the Estimator is waiting a quote for from their supplier as they did not provide all the items he had requested. So, instead I will report on our electrical consultation in this post.

Our electrical consultation was held on the same day as our internal colour appointment. We met a lovely lady, M, from Vaccaro Group. M was professional and explained to us the basics of the ‘musts to have’ and ‘good to have, but can be done later’, so that we do not stretch our budget very far. We had a budget of 10K to spend, and the variations did not deviate much from that figure. We spent a little over three hours and completed most of our selections at 5 PM when the computer froze! Thanks to the System’s auto save feature (which was actually annoying, as it saved every 5 mins), we did not lose any data. M advised that she would email me us our selections, which then provided us an opportunity to review at leisure. Note Metricon/Vaccaro’s standard policy, which is “Electrical selections and plans are to be finalised and signed off on the same day as your appointment”; so, we were pretty lucky to get some time off to review. We took our electrical plans last week-end to Beacon Lighting to make our actual light selections and sought their advice on many items. I emailed M our amendment requests after reviewing the electrical plans.

OK, now to the actual selection process: As you can see in the picture in this post, the system they use allows us to clearly see the approximate locations of switches, batten holders and other electrical items we ask for.  Note that the height of all lights switches is approx. 1050 mm above slab level; all external junction box for future wall lights are 1800 mm AFL (above floor level); all light points above mirror to any bathroom are 2100 mm AFL, while all GPOs (General Purpose Outlet / Socket Outlet), commonly known as power point, are 300 mm AFL. So, if you want at any other height, you would need to specify them.

We love down lights (D/Ls), but were anxious about the prices. Reading from other blogs, I was under the impression that CFL D/Ls lights provided by metricon are about $105 each, and I was wrong. M clarified that halogen D/Ls are $105, 11W CFL D/Ls are $125 and 11W LED D/Ls are $200. When I heard the prices I almost fainted! So, I asked M’s suggestion, and her solution was to get Batten Holders at this stage for $40 each and then get them converted to future D/Ls. A week before our electrical appointment, I enquired with Beacon Lighting on LED D/Ls, and they were having a promotion on LED D/Ls (30% off second light and subsequent ones). So, yesterday we went to Beacon and chose LEDlux 11W 600 Lumen Brushed Chrome D/L Kit that was priced $60 for the first one and $42 for the second light. I also contacted an electrician recommended by Beacon (as we do not have any sparky friends), who charges $30 to install a D/L. So, the approximate cost of having a LED D/L is $40 for the ceiling point (that comes with a batter holder and a bulb) + approx. $50 for LEDlux 11W Led D/L + $30 to install it = $120. We ultimately selected 25 LED D/Ls via Beacon, which is a saving of $2000 ($80 per D/L x 25).

There were a few other items that were ridiculously expensive (eg., metal cover plates that were $15 each, as opposed to about $5 if you were to do it post hand over); so we stuck to the standard ones. All light switches are Classic C2000 style, with the exception of Kitchen and Pantry glass splashback switches and sockets, which are Clipsal Saturn Espresso Black, approx. $140 each; and double power point on kitchen island bench, where we selected Black C2000 style for an additional $10.

For tricky places that required recessing the lights (lights in niches in Entry;  lights under Over Head Cupboards in Kitchen; and lights on walls in Stairs), we bit the bullet and purchased lights via Metricon/Vaccarro, so that they can be responsible for installation of those lights.

With the exception of 2 light points (batten holders) in Portico (for future D/Ls), 1 light point in Balcony (for future D/L), 1 wall light point on Garage (for future wall down light) and three batten under eaves (for future double spot lights), we asked for 3 junction boxes for external lighting, at a cost of $75 each.

There are many more items on which I wish to write; and I will continue those in my next post on electrical selections.

Monday, 1 October 2012

Internal Colour and Electrical Appointment-1


We had our internal colour and electrical appointment on the same day this week. It started at 9:30 AM and finished at 5:30 PM. It was not overwhelming, as we did our homework prior by visiting display houses and having several bed time discussions!

Both the internal colour and electrical selections were a fun experience, although we felt that the internal colour selections process was a bit rushed. It was neither the fault of the Studio M Consultant nor ours. We had the Studio M manager itself as our consultant, who was very knowledgeable and helpful with our selections and provided her wisdom on which ones to upgrade through metricon and items we could consider upgrading ourselves post hand-over.

We were quite detailed in our selections, and we provided a modified kitchen cabinetry design for the consultant to pass on our rough drawings to the drafting department.

We think we did not go crazy with the internal colour selections. The Consultant said she would email us the selections (along with prices) in a week or so for our review.

As there are so many selections, I will write about them in a series of posts rather than rush through one or two long posts. This post is on internal paint and stain colours.

INTERNAL PAINT AND STAIN COLOURS


Hog Bristle Full Strength for internal walls; Hog Bristle Quarter Strength for Architraves, Skirting, Ceiling and SOR 5 internal doors


Feature Colour 1: Dulux Mid Night Secret similar to this one 


Feature Colour 2: Dulux Eastern Gold


Architraves: Double Pencil Round 67 x 18 mm


67 mm architraves are those ones that surround the window


75 mm Scotia Cornice

Intergrain Rich Chocolate Stain for Stairs and JST 1 internal doors


Hume JST1 timber internal doors (in rich chocolate stain) with transulescent glass for master bedroom, pantry/laundry, study, guest bedroom (sitting), ensuite and PDR

This is Charcoal stain, we will have a shade darker than this (rich-chocolate)


Pantry/laundry internal doors


Internal doors to Study

HUME Sorrento SOR 5 internal doors to remainder of the house


Staircase: Maple treads and risers, in rich chocolate stain finish,with stainless steel balusters. The handrail would be rectangle and continuous instead of curved; and there would be no newel post - see picture below to get an idea (however, will not have semi open treads like the one below as they are very expensive!)


The stairs will have a P35 control joint in lieu of standard MDF cover board.


Tuesday, 25 September 2012

The Land is Ours!

We now own a large piece of dirt!!!

Our Lawyer advised us that Settlement occurred last Friday. We also obtained Section 149 Certificate, which provides information on how our property may be used and the restrictions on development. As far as I could see, there are no problematic restrictions. The land is also not excluded from the operation of State Environmental Planning Policy 2008, which means complying development may be carried out under the Policy. One thing that pleasantly surprised us was that the land is not recorded in Council’s records as bushfire prone land, which is in contrast to the bushfire report provided by the Developer (Stockland). I called Council, which advised me that although our land is close, it won’t be affected. This is a big relief (I hope). The next step is to contact Metricon and ask them to remove the bushfire item from our Contract and reduce the price accordingly.


We requested Internal Selections and Electrical Appointment (3 + 3 hour appointment) as soon as possible for family reasons, and luckily Metricon was able to provide us with an appointment this week. We visited the display house at Freemans Ridge last weekend and spent over 5 hours discussing electrical items! We have more decisions to make and have been spending some time every day before our appointment.

We followed the lead from Jess & Ryan (Nolan 45) and asked our Studio M consultant to provide us with the Colour Schedule (lists things that we would have to make a decision on in the appointment) and the Consultant emailed us straightaway the document. Thanks also to Birds Nest blog that provided suggestions for electrical appointment, which we have taken on board.

We are excited and equally nervous for the big day at Studio M!

Thursday, 13 September 2012

Registration of Subdivision

Source: www.stockland.com.au


Last week-end, we received notification from Stockland that the plan of subdivision, within which our new home site is located, has been registered. We expect Settlement by the third week of September. We have formal bank approval; so, I hope everything goes to plan.

Two weeks after we signed the Contract, we paid the 5% deposit. At the time of signing, there were a few errors in the drawings which we asked Metricon to address, in addition to requesting a few changes such as converting some hinged doors to sliding doors, adding sound screen batts to some bedroom walls to protect against noise pollution and insulation batts to entire garage floor ceiling so that the upstairs bedroom flooring immediately above the garage is shielded, adding timber look floating laminate flooring throughout the house (in lieu of the Promotion that offers laminate flooring only to main living areas), adding a recycled tap in addition to the two standard taps Metricon provides and adding/modifying a few windows. Metricon raised a post contract variation totalling about 6K and sent us the updated drawings reflecting the post contract variation.

Four days after Metricon lodged our plans and colour schemes for Developer Approval, we received notification from Stockland that our application for Full Design Approval has been approved according to the Design Requirements for Brooks Reach. Yeah! We are glad to have had two significant events happening within a week’s time.

A number of people from Metricon have so far been managing a sequence of events from the initial discussion of plans to following through on getting the updated drawings. We have been fortunate to have some good people manage our case right from Sales Consultant (RH)->Design Manager (YD)->Contract Presenter (MS)->Customer Support Team Leader (JO’D)->Customer Support Coordinator (SY), and I am relieved to see that it has been an efficient process so far.

We now await Settlement, so we can get some documents from Council that Metricon requires to proceed to the next stage of our pre-construction phase.  

Sunday, 9 September 2012

Windows


Now you would ask what is it so exciting about windows that they are worth reading about and seeing in a post?

Well, when we were exploring display houses, we realised we liked different designs of windows. We wanted to make sure that the window designs we liked were possible to be included in the house we selected (Phoenix). So, I took pictures of windows and measure their size and showed to our consultant. A while ago, I read a blog by a Metricon owner, who lamented that the kitchen window he ended up with was not only shorter than the one he saw in the display house (although he apparently requested the same display house window in the kitchen), but the window had an architrave around it).

What you mostly see in display houses are non-standard windows – they are made of a different material (timber instead of powder coated aluminium), in addition to being longer, shorter, smaller or bigger. So, it becomes difficult to visualise how the standard windows would look like in your house.

The moral of the story here is do your research – measure the size of the window and know the type of the window, including the terminology used to describe it, before requesting it to be included in your house – as the size and type are unlikely to be allowed to be changed once you sign the Contract.

Here are pictures of windows we selected, contrasted with what we saw in display houses.


These are timber 'Armadale' style awning windows to front elevation. We initially asked for the same window height however in Aluminium, but were advised that sweeping and vacuuming would become difficult if the windows are located so low; so, we chose to accept 1800 mm H x 2400 mm W windows that are standard.

These are the standard windows you would get in the upstairs front elevation if you choose Plantation facade (standard in Phoenix). All our doors are 2340 mm H, except this balcony door, which aligns with the height of the windows. 

These are 3 x 1800 mm H x 500 mm W timber awning windows; We get 3 x 1800 mm H x 600 mm W Aluminium awning windows as standard.

This is the inside view of 500 mm W windows in the Phoenix display house.

These are 2100 mm H x 3000 mm W feature timber fixed mullion picture window with three fixed panels. We get 1800 mm H x 2650 mm W feature aluminium fixed mullion picture window with three fixed panels at an additional price of $750 (in lieu of same size sliding windows).

The splash back windows are 686 mm H x 3000 mm W fixed horizontal feature aluminium window with square set plaster reveals to side elevation of Kitchen. We get the same window (however 2710 mm W) at an additional price of $460 in lieu of 514 mm H x 2710 mm W similar type window that is offered in Imagine Promotion.

These windows appear 514 mm H that are typically offered in promotions.

These are 686 mm H x 1500 mm W fixed horizontal feature aluminium window with square set plaster reveals to side elevation of Butler's Pantry. We get a similar window however 1570 mm W at an additional price of $610 in lieu of standard wall.

These are 1200 mm H x 1800 mm W aluminium sliding windows that comes standard in bedrooms. 

These are 514 mm H x 1500 mm W aluminium sliding windows that will be in Children's bathroom. The window cannot be any higher because of the Outdoor room / Dining room roof line below and cannot be any wider due to the location of the shower.

Checkout the window above and below. These are horizontal windows that not only provide visual appeal, but also privacy in bedrooms. They seem 514 mm H. We asked for 686 mm H fixed aluminium windows in children's bedrooms in the rear elevation to take advantage of sunlight in the East (in addition to 1.2 m H x 1.8 W standard windows in the side elevation). We also requested long fixed horizontal windows (different widths and heights) in the Garage and other bedrooms.


Sunday, 19 August 2012

New Home Contract Signed


With Metricon correctly addressing most of our requested structural changes before the Contract Agreement meeting, we met MS, who presented every item of the Tender (Contract). We only changed one item during the presentation – widening the kitchen window from 2 to 2.7 metres. The meeting lasted over 2.5 hours, after which we put our initials on 3 copies of the HIA contract, and signed our lives away! We had gone through this process once (see my first post) and I am glad our Metricon design with a few changes is better and bigger than the previous one. I can honestly say that when this one becomes a reality, it would be the “dream home”; and therefore, we felt excited to have reached this important milestone in the process.

We did not pay the balance of the 5% today, but were advised that we would have to pay that soon.

The top 10 pricy items, in addition to the site costs, and complying with BASIX and 12.5 bush fire requirements are:

·         Dining room extension: 15.3K
·         Outdoor room extension: 13.5K
·         Front entry pivot door with door furniture: 3.8K
·         9 x timber with translucent glass doors: 9K
·         Revised layout and fit out for Butler’s Pantry including laminate pantry, 2 x 620 wide cavity sliding door units, laminate base cupboards and bench top, tiled splashback, round inset bowl and mixer: 6K
·         Increase PDR room (3.0 x 3.1) & include WIR, doors, windows, shower, exhaust fan, ceiling light point, and mirror: 5K
·         Air conditioning ducts only and up to 12 outlets: 4.2K
·         Redesign kitchen with wide kitchen island bench, plus base cupboards, drawers etc: 3.3K
·         Upgrade staircase to include stained finish to maple tread and risers, with zig zag capping: 2.8 K
·         2.55 m High ceiling to first floor (higher ground floor comes as part of the promotion): 2.6K

Our Plantation Facade
After Contract Agreement/Signing, we had a quick lunch before making selections on our external colours that is required for Stockland Developer Approval. Following are our selections:

Hebel Main: Dulux Gnu Tan
Balcony beam: Dulux Hog Bristle
Gutter, Fascia and Water tank: Colorbond Paperbark
Eaves/Lining: Dulux Hog Bristle Quarter
Downpipe: PVC round downpipes, painted in Paperbark

You will note Gnu Tan (pillar), HogBristle (upper and lower balcony beam) and
Paperbark (gutter and fascia - see above garage) in this picture (our facade is Plantation, not Oakpark)
Scyon 300 mm 'Stria' board lightweight cladding
(ours will be painted Hog Bristle, not the one you see in the photo)
Timberlook steel garage door (Panel Glide Tuscan Profile Colorgrain CAOBA)
(Image sourced from shayneandjasonbuildahouse.blogspot.com.au)
Aluminium Powder Coated Sliding Doors and Windows in Interpon Hamersley Brown
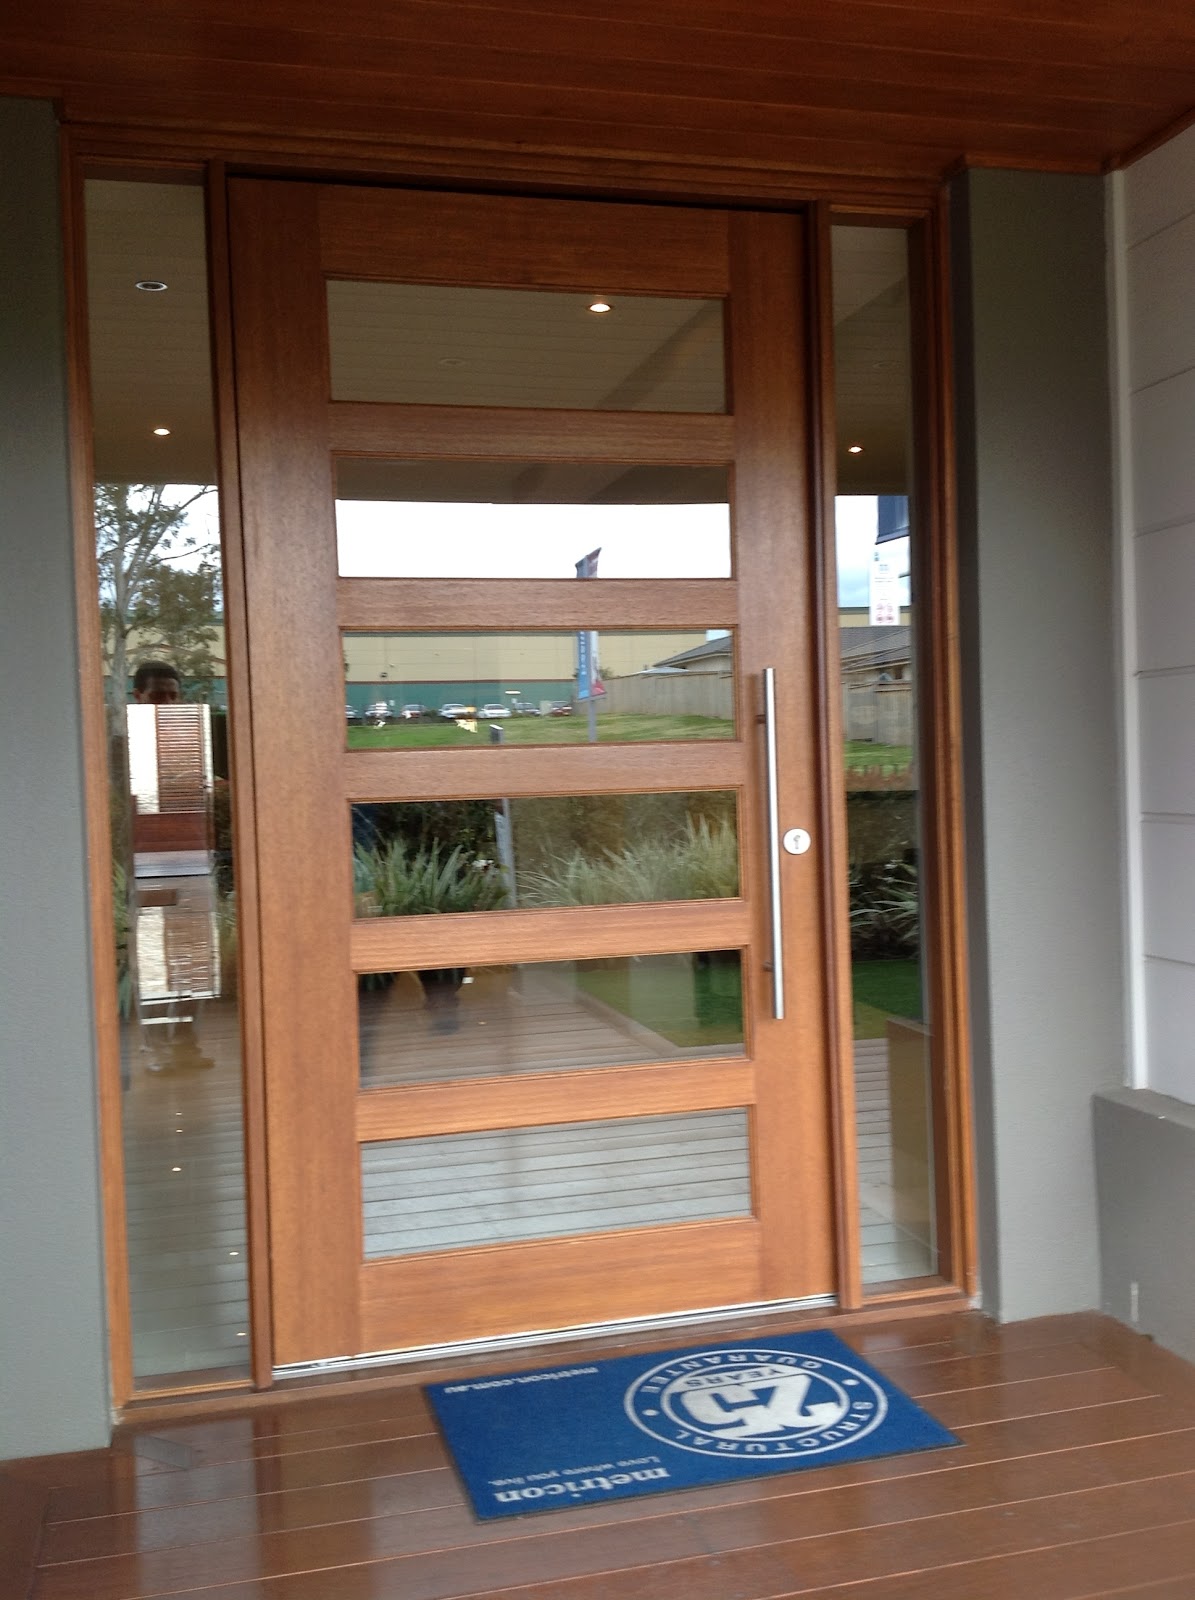
Pivot Door Hume XS26 2340 x 1200 in Merbau + sidelights in Merbau stain finish plus
Gainsborough 750 mm Horizon back to back pull handle 9248PHBB750SS + lock
We requested translucent glass to the main door and clear glass to the sidelights
Intergrain Merbau stain
Silver Chrome handrail (similar to the one in the picture), with horizontal stainless steel wire balustrade
(Image sourced from www.civico.com.au)

Other external selections include: Roof tiles in Classic Gun Metal; Timber posts in Dulux Pawn Broker (Dark Chocolate Brown with a tinge of Dark Red); Decorative timber slats infill to dutch gable in Intergrain Merbau; and 
Barge/gable end of the roof in Colorbond Paperbark.

Monday, 13 August 2012

Update on Registration of Land & from Metricon


With Stockland advising us that the Plan has been lodged with the Land and Property Information, and consequently registration anticipated in the next 2 to 3 weeks, I thought it would be timely to release pictures of our block of land.

Below are site plans showing our driveway design and siting of the house, along with our driveway gradient profile – yes, we have a long driveway! However, it righty slopes down gently from the garage door; so any excess water (from rain etc) drains naturally, thus avoiding the need to provide a grated drain across garage openings.

Stockland consultant confirmed that the Yellow duct seen on one of the pictures is only an offcut that is placed on the star picket as a marker for the sewer connection point, which will be removed when the sewer pipes are cut down to ground level.

I sent an email to Concrete Colour Systems (CCS) requesting them to send me a brochure of driveway colours; I received a pack within a week that included a ‘True to Life Colour Card’ consisting of 60 drive way colours of coloured concrete. For more information, see www.concretecoloursystems.com.au The arrival of the brochures is timely, as we will have to provide our drive way colour during the external colour appointment at Metricon next week.

We received the revised Preliminary Contract from the Design Manager (YD) of Metricon last week, a few days after he responded to a number of queries we raised earlier on structural matters. I double checked all 123 items in the Contract and emailed YD on the week-end about 20 items that required attention. YD responded that he would go through the items and get back to us prior to the appointment late this week.


Sunday, 5 August 2012

Amended Floor Plans


Last week, I emailed the Design Manager (YD) and requested him to send us the revised floor plans for our review. YD sent a reply in 2 hours with the revised sketches, however advised that the revised Tender is not ready and apologised for the delay.

The amended floor plans captured most of our requirements. The key changes we requested were to:

ü  Convert the Sitting room and PDR to a Guest Bedroom plus ensuite with an additional entry via the Foyer.
ü  Include a bench top next to WC upstairs
ü  Include WIR to Bed 5 and WIL adjacent to Bed 5, thus reducing the overall area of Leisure.
ü  Redesign Kitchen, Pantry and Laundry.

Metricon’s site details most of the redesigns pertaining to rooms/closets. For example, our Guest bedroom with ensuite is a replica of Nolan Guest Bedroom + Ensuite (go to the dropdown list of structural changes on the Floor Plan page). Others such as our upstairs PDR can be found in the design of Newhaven, while our WIR and WIL designs are variations of the ones that can be found in Imperial.


Other minor changes (additions/variations) included:

ü  920 mm wide cavity sliding door to Guest Bedroom.
ü  2 x 620 mm wide cavity sliding doors to Study and Master ensuite.
ü  2340 mm H stacker sliding doors (from Family & Dining) to Outdoor Room; 2100 H bi-part doors to Dining.
ü  686 mm H horizontal aluminium fixed window with square set plaster reveals to Kitchen & Butler’s Pantry.
ü  514 mm high horizontal feature aluminium fixed window to side elevation of Garage.
ü  1800 mm high feature aluminium fixed mullion picture window with three fixed panels in Family
ü  1200 mm high aluminium sliding window in Study.
ü  686 mm high horizontal aluminium fixed windows to rear elevations of Bed 3 & 4 (in addition to standard windows to side elevations).
ü  Relocation of feature plaster diving wall between Bed 1 and Bed 1 WIR by 500 mm towards Bed 1 in lieu of standard to create a 1300 mm wide passage way.
ü  Increase in depth of Bed 1 robe to 600 mm (so that clothes do not get squished when sliding doors close).
ü  Square set ceilings to ground floor.
ü  300 mm wide x 1200 mm deep plaster bulkhead to perimeter of Entry.

After a review of the floor plans, I flicked an email to YD seeking minor changes (some of these were communicated during our Preliminary Contract Meeting, but I presume were not interpreted correctly; and therefore, we have asked YD to address them now). These include a horizontal feature aluminium window in the Sitting/Guest bedroom, location of rainwater tank, location of dishwasher on the Island bench so that we have pot drawers throughout and project a clean image on the Kitchen appliance bench side and height of door leading to Balcony; and seeking some minor clarifications on Laundry design.

After I sent an email, I realised I missed one additional minor point. The Design does not seem to capture a door to the under stairs storage area and so flicked another email seeking confirmation.